Thunderbird
Jump to navigation
Jump to search
This page describes how to set up your Thunderbird to work with mail from Netsville's servers. Although the descriptions below are for the 7.0.1 version, they should work on older versions of Thunderbird as the interface has not changed too much.
- Go to Tools > Account Settings
- In the left pane, click the drop-down marked "Account Actions" and select "Add Mail Account"
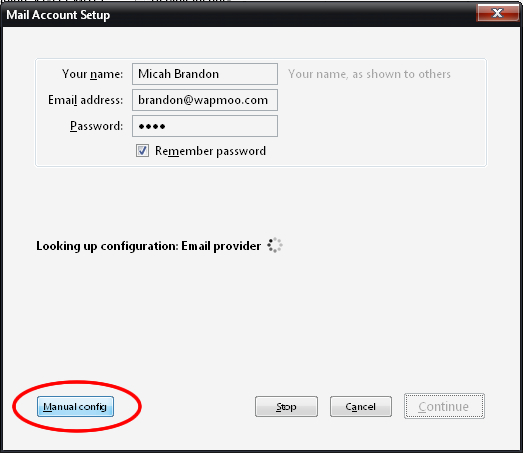
- In the next screen, enter your name, your full email address, and the password for the account
- Click the "Continue" button
- Ignore the lookup text and click the button marked "Manual config" on the left.
- The screen will change to the following:
- The screen will change to the following:
- Change the settings to match the graphic above.
- Click the "Re-test" button


If you successfully set up your account, the "Add Account" button will un-grey and allow you to click it.
If you get a warning message:
Thunderbird failed to find the settings for your email account
Double-check that you have:
- Entered your full email address as the "username" where requested
- Entered your password correctly
- The authentication is set to SSL/TLS
Outgoing Server
The first time you set up an account with Thunderbird, you will need to set up your outgoing server too.
- Go to Tools > Account Settings
- In the left pane, click to highlight the line marked Outgoing Server (SMTP)
- Click the "Add" button
- Fill in the data below:
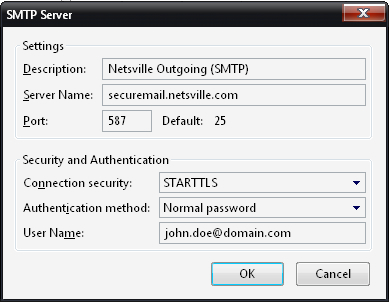
- Obviously, replace john.doe@domain.com with your complete email address
- Click the "Ok" button.


Send yourself a test email. If you receive the test email, you're good to go. If not, double-check that you have entered the SMTP server exactly as above, replacing john.doe@domain.com with your complete email address.