IPhone
Jump to navigation
Jump to search
This page details how to configure your iPhone or iPad to to receive email from Netsville and send it to Apple.
- After you click the Settings icon, you'll be at this page. Choose: Mail, Contact, Calendars:
- Mail, Contact, Calendars
- Add Account (Other)
- Other / Add Mail Account
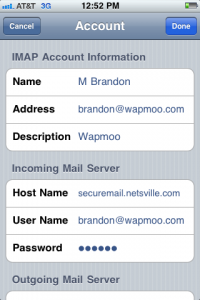
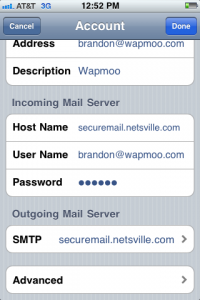
- Filling out the Account information. The import parts on this screen are the User Name and Hostname.
- * You must use your full email address as the User Name
- * The Host Name of the Incoming Server is securemail.netsville.com
- * Fill in whatever your password is
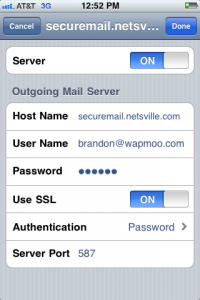
- SMTP - setting up SMTP Authentication for the Primary Server
- * Create an Outgoing Mail Server called securemail.netsville.com

- Primary (SMTP) Server
- * Make sure the Authentication type is Password
- * Turn SSL ON
- * The Outgoing Server Port is 587
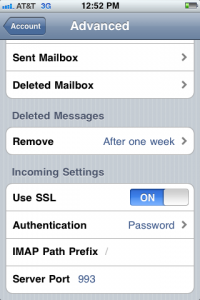
- Advanced (Incoming Settings)
- * Turn SSL ON
- * Authentication is Password
- * Incoming Server Port should be 993 for IMAP. For POP3 it should be 995